Difference between revisions of "RASPBERRY PI Arduino Shield ADD-ON/zh-cn"
From ITEAD Wiki
(Created page with "我们不仅仅只是提供一块可以方便的插在树莓派上面的板子,还为其配套提供了SDK,移植了Arduino上的驱动程序。安装完SDK后,就可以...") |
|||
| Line 3: | Line 3: | ||
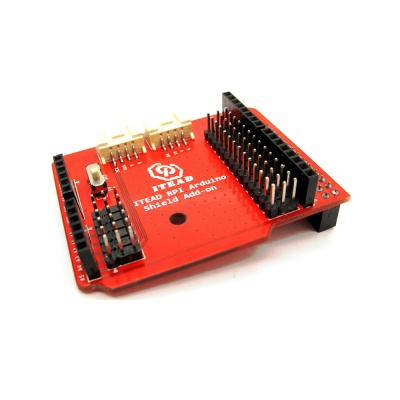
市场上有各种各样为Arduino定制的[[Shield]]和电子积木,而为树莓派定制的相对不多。这款RPI Arduino [[Shield]] Add-on 把树莓派的32PIN Connector 扩展为Arduino 引脚,可以方便连接各种Arduino Shields,同时引出2组Grove电子积木接口,可连接各种电子积木。 | 市场上有各种各样为Arduino定制的[[Shield]]和电子积木,而为树莓派定制的相对不多。这款RPI Arduino [[Shield]] Add-on 把树莓派的32PIN Connector 扩展为Arduino 引脚,可以方便连接各种Arduino Shields,同时引出2组Grove电子积木接口,可连接各种电子积木。 | ||
| − | + | 我们不仅仅只是提供一块可以方便的插在树莓派上面的板子,还为其配套提供了SDK,移植了Arduino上的驱动程序。安装完SDK后,就可以像在Arduino平台底下一样,非常轻松的驱动这块板子。 | |
==Features== | ==Features== | ||
Revision as of 09:36, 17 July 2014
Contents
概述
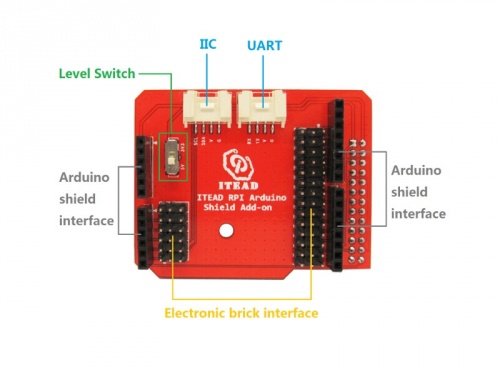
市场上有各种各样为Arduino定制的Shield和电子积木,而为树莓派定制的相对不多。这款RPI Arduino Shield Add-on 把树莓派的32PIN Connector 扩展为Arduino 引脚,可以方便连接各种Arduino Shields,同时引出2组Grove电子积木接口,可连接各种电子积木。
我们不仅仅只是提供一块可以方便的插在树莓派上面的板子,还为其配套提供了SDK,移植了Arduino上的驱动程序。安装完SDK后,就可以像在Arduino平台底下一样,非常轻松的驱动这块板子。
Features
- extend RPI 32pin connector to Arduino Shield
- two groups of Grove electronic brick interfaces
- two electronic brick intefaces
- two optional voltage levels 3V3/5V
Specification
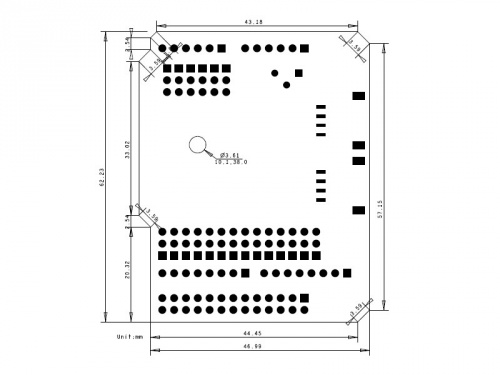
| PCB Size | 62.33X49.67X1.6mm |
| Interface | IIC, UART, Arduino Shield |
Electrical Characteristics
| Characteristics | Symbol | Min | Typ | Max | Unit |
| Power supply voltage | VDD | 3 | 3.3 | 3.5 | V |
Hardware
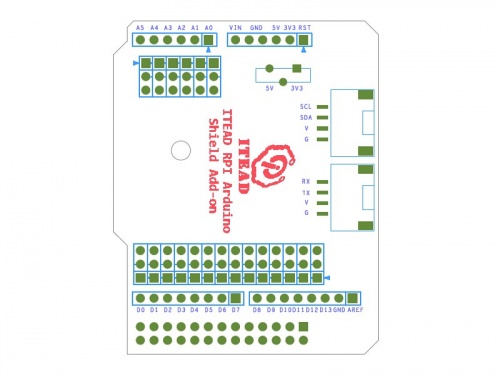
Pin Map
| Pin Index | Pin Name | Arduino Shield | Description |
| 1 | 3V3 | - | |
| 2 | 5V | - | |
| 3 | SDA | A4 | UART SDA |
| 4 | 5V | - | |
| 5 | SCL | A5 | UART SCL |
| 6 | GND | - | |
| 7 | GPIO7 | D9 | UART TXD |
| 8 | TXD | D1 | |
| 9 | GND | - | |
| 10 | RXD | D0 | UART RXD |
| 11 | GPIO0 | D2 | |
| 12 | GPIO1 | D3 | |
| 13 | GPIO2 | D4 | |
| 14 | GND | - | |
| 15 | GPIO3 | D5 | |
| 16 | GPIO4 | D6 | |
| 17 | 3V3 | - | |
| 18 | GPIO5 | D7 | |
| 19 | MOSI | D11 | |
| 20 | GND | - | |
| 21 | MISO | D12 | |
| 22 | GPIO6 | D8 | |
| 23 | SCK | D13 | |
| 24 | CE0 | D10 | |
| 25 | GND | - | |
| 26 | CE1 | A3 |
Instruction
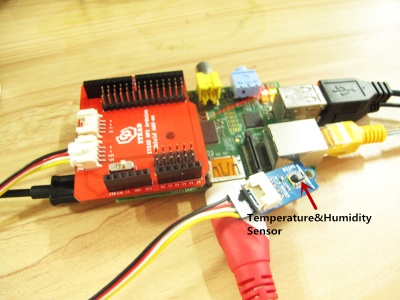
- Plug Rpi Arduino Shield Add-on into RPI V2, connect SHT10 to IIC interface through 4-pin wires. Power Raspberry Pi V2.
- Download the SDK from this link: https://github.com/iteadsw/SDK and then install it.
- Modify the file ReadSHT1xValues.ino
- modified codes as below:
- define dataPin 3
- define clockPin 5
- Enter into the directory libraries/itead_SHT1x/examples/ReadSHT1xValues, compile and run the file ReadSHT1xValues.ino
- Command as below to compile ReadSHT1xValues.ino
- $ iteadcompile ReadSHT1xValues ReadSHT1xValues.ino
- Command to run this program
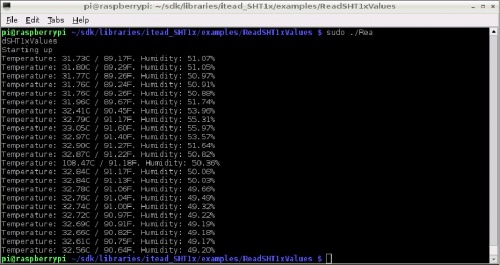
- $ sudo ./ ReadSHT1xValues
- When the compilation is done, you can read the temperature and humidity data from the terminal.
 Notice