Difference between revisions of "ITEAD Joystick shield"
(Created page with "==Overview== ==Specifications== ==Electrical Characteristics== ==Hardware== ===Pins description=== ===Jumper description=== ===Pin map description=== ==Download== ==Us...") |
(→Overview) |
||
| Line 1: | Line 1: | ||
==Overview== | ==Overview== | ||
| + | |||
| + | [[File:Joystick Shield kit .jpg|thumb|400px|right]] | ||
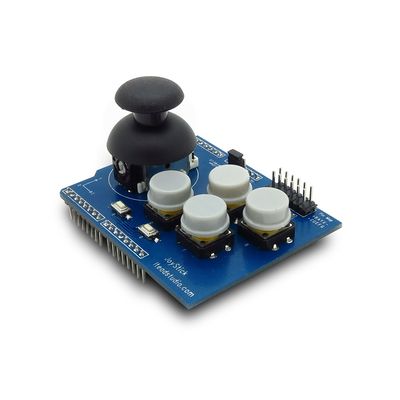
| + | The Joystick [[Shield]] kit contains all the parts you need to enable your Arduino with a joystick! The [[shield]] sits on top of your Arduino and turns it into a simple controller. Five momentary push buttons (4+ joystick select button) and a two-axis thumb joystick gives your Arduino functionality on the level of old Nintendo controllers. | ||
| + | |||
| + | The momentary push buttons are connected to Arduino digital pins 2-6; when pressed they will pull the pin low (utilizing the internal pull-ups of the Arduino). Vertical movement of the joystick will produce a proportional analog voltage on analog pin 0, likewise, horizontal movement of the joystick can be tracked on analog pin 1. | ||
==Specifications== | ==Specifications== | ||
Revision as of 03:23, 23 May 2014
Contents
Overview
The Joystick Shield kit contains all the parts you need to enable your Arduino with a joystick! The shield sits on top of your Arduino and turns it into a simple controller. Five momentary push buttons (4+ joystick select button) and a two-axis thumb joystick gives your Arduino functionality on the level of old Nintendo controllers.
The momentary push buttons are connected to Arduino digital pins 2-6; when pressed they will pull the pin low (utilizing the internal pull-ups of the Arduino). Vertical movement of the joystick will produce a proportional analog voltage on analog pin 0, likewise, horizontal movement of the joystick can be tracked on analog pin 1.
 Notice