Difference between revisions of "RASPBERRY PI OLED ADD-ON/zh-cn"
(Created page with "树莓派OLED模块") |
(Created page with "==概述== right 市面上很少能找到为树莓派量身定制的OLED屏幕,/在很多应用项目中,我们仅需要显示非常...") |
||
| Line 1: | Line 1: | ||
| − | == | + | ==概述== |
[[File:IM140714003_3.JPG|thumb|400px|right]] | [[File:IM140714003_3.JPG|thumb|400px|right]] | ||
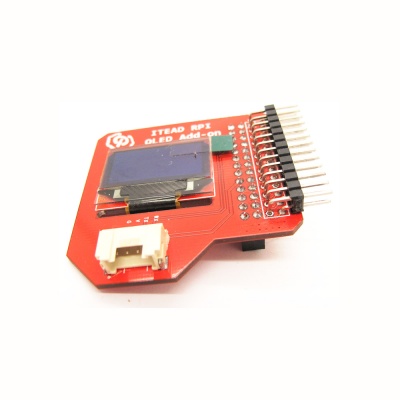
| − | + | 市面上很少能找到为树莓派量身定制的OLED屏幕,/在很多应用项目中,我们仅需要显示非常简单的一些信息,比如系统状态、IP等信息,/或者对便携性有较高需求,这时候用HDMI去接一个大屏幕明显不合适,一个小巧的OLED屏幕刚好能满足这种需求。 | |
| + | |||
| + | OLED Add-on是为树莓派量身定制的,板载一块0.96" 128*64 OLED屏幕,控制芯片为SSD1306,每一个像素点都可以通过SSD1306独立控制点亮或者关闭。 | ||
| + | |||
| + | 我们不仅仅只是提供一块可以方便的插在树莓派上面的板子,还为其配套提供了SDK,移植了Arduino上的驱动程序。安装完SDK后,就可以像在Arduino平台底下一样,非常轻松的驱动这块板子。 | ||
OLED add-on with built-in 0.96" 128*64 OLED and SSD1306 control chip is customized for Raspberry Pi. Every single pixel in OLED can be lighted up or off by this SSD1306 control chip. | OLED add-on with built-in 0.96" 128*64 OLED and SSD1306 control chip is customized for Raspberry Pi. Every single pixel in OLED can be lighted up or off by this SSD1306 control chip. | ||
Revision as of 09:18, 17 July 2014
Contents
概述
市面上很少能找到为树莓派量身定制的OLED屏幕,/在很多应用项目中,我们仅需要显示非常简单的一些信息,比如系统状态、IP等信息,/或者对便携性有较高需求,这时候用HDMI去接一个大屏幕明显不合适,一个小巧的OLED屏幕刚好能满足这种需求。
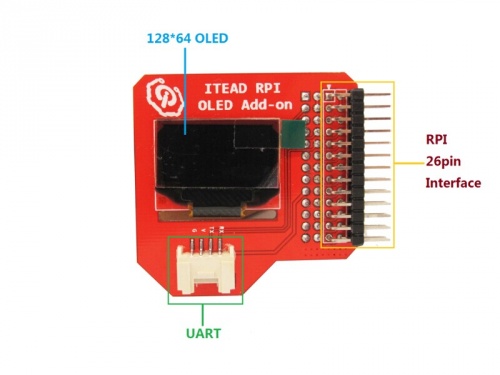
OLED Add-on是为树莓派量身定制的,板载一块0.96" 128*64 OLED屏幕,控制芯片为SSD1306,每一个像素点都可以通过SSD1306独立控制点亮或者关闭。
我们不仅仅只是提供一块可以方便的插在树莓派上面的板子,还为其配套提供了SDK,移植了Arduino上的驱动程序。安装完SDK后,就可以像在Arduino平台底下一样,非常轻松的驱动这块板子。
OLED add-on with built-in 0.96" 128*64 OLED and SSD1306 control chip is customized for Raspberry Pi. Every single pixel in OLED can be lighted up or off by this SSD1306 control chip.
We not only offer an easily-plugged add-on for Raspberry Pi, but also provide an SDK that help you transplant Arduino’s driver into Raspberry Pi. After installing the SDK, you can drive this add-on as easily as you do on Arduino.
Features
- Customized for Raspberry Pi, plug and play without wiring
- 0.96" OLED with 128*64 pixels
- Stackable
- Coming with one Grove interface for Electronic bricks
Specification
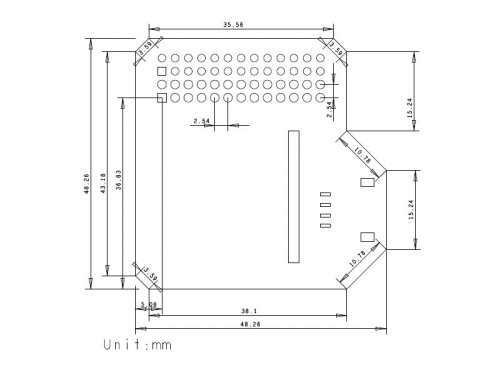
| PCB size | 48.35mm X 48.47mm X1.6mm |
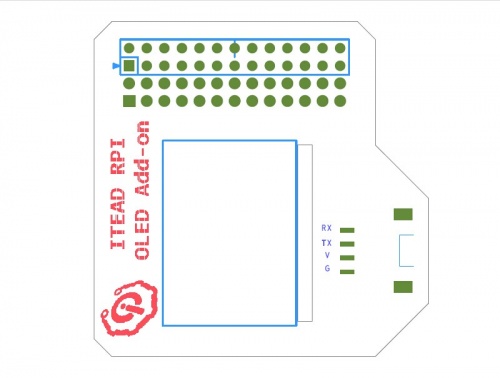
| Interface | RPI 26pins Interface X2,UART |
Electrical Characteristics
| Characteristics | Symbol | Min | Typ | Max | Unit |
| Power supply voltage | VDD | 3 | 3.3 | 3.5 | V |
| High input voltage | VIH | 0.8XVDD | - | VDD | V |
| Low input voltage | VIL | 0 | - | 0.2XVDD | V |
| Operation current for VDD | IDD | - | 180 | 300 | uA |
Hardware
Pin Map
| Pin Index | Pin Name | OLED 2864 pin | Description |
| 1 | 3V3 | - | |
| 2 | 5V | - | |
| 3 | SDA | SDA | |
| 4 | 5V | - | |
| 5 | SCL | SCL | |
| 6 | GND | - | |
| 7 | GPIO7 | UART TXD | |
| 8 | TXD | ||
| 9 | GND | ||
| 10 | RXD | UART RXD | |
| 11 | GPIO0 | ||
| 12 | GPIO1 | ||
| 13 | GPIO2 | ||
| 14 | GND | ||
| 15 | GPIO3 | ||
| 16 | GPIO4 | RST# | |
| 17 | 3V3 | ||
| 18 | GPIO5 | ||
| 19 | MOSI | ||
| 20 | GND | ||
| 21 | MISO | ||
| 22 | GPIO6 | ||
| 23 | SCK | ||
| 24 | CE0 | ||
| 25 | GND | ||
| 26 | CE1 |
Instruction
- Plug OLED add-on into Raspberry Pi and power it
- modify the file /etc/modprobe.d/raspi-balcklist.conf
- modified codes as below
- blacklist spi-bcm2708
- blacklist i2c-bcm2708
- modify /etc/modules
- add a line in the end as below:
- i2c-dev
- reboot
- Download the SDK from this link: https://github.com/iteadsw/SDK and then install it
- Enter into the directory libraries/itead_SSD1306/examples/oled_Animation_Sample/, then compile and run this file oled_Animation_Sample.ino
- Command as below to compile oled_Animation_Sample.ino
- $ iteadcompile OLED oled_Animation_Sample.ino
- Command to run this program
- $ sudo ./OLED
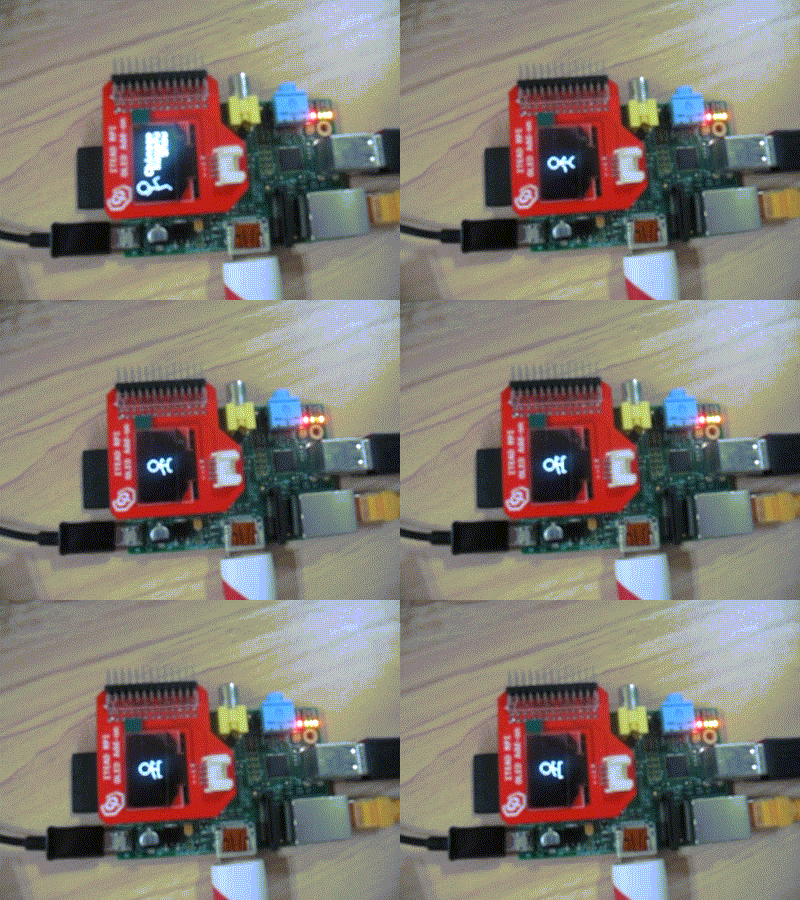
- When the compilation is done, you can see a little man dancing on OLED.
Download
Useful Link
https://github.com/iteadsw/SDK https://github.com/iteadsw/SDK/tree/master/libraries/itead_SSD1306
 Notice